I {heart} Food

Tuesday, December 15, 2009

Oreo Truffles


1 Package Oreo cookies, finely crushed and divided

1 package (8 oz) cream cheese, softened

2 packages (8 squares each) semi sweet chocolate, melted

1.Crush 9 of the cookies to fine crumbs in food processor; reserve for later use. (Cookies can also be finely crushed in a resealable plastic bag using a rolling pin.) Crush remaining 36 cookies to fine crumbs; place in medium bowl. Add cream cheese; mix until well blended. Roll cookie mixture into 42 balls, about 1-inch in diameter.
2.Dip balls in chocolate; place on wax paper-covered baking sheet. (Any leftover chocolate can be stored at room temperature for another use.) Sprinkle with reserved cookie crumbs.
3.Refrigerate until firm, about 1 hour. Store leftover truffles, covered, in refrigerator


Posted by Allison Holmes at 9:48 PM No comments:
Email ThisBlogThis!Share to XShare to FacebookShare to Pinterest
Labels: Chocolate, Cookies, Desserts

Saturday, November 28, 2009

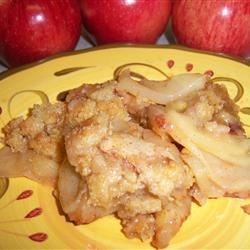
Grandma Hastain's Apple Crisp


I was given the task of making THE apple crisp for the Hastain thanksgiving... it is a tradition and I think it turned out fantastic...(I even tweaked it but don't tell grandma!)

Filling:
5-6 apples, cored and peeled (I used Roma)
1/3 cup water
2 Tbsp. brown sugar
1/4 tsp nutmeg
1 tsp. cinnamon

Place apples in a greased 9x13" pan. Mix water, brown sugar, nutmeg and cinnamon until combined and pour over apples. Set aside.

Crust:
1/3 cup butter
1 1/2 cup flour
1/1/2 cup sugar
1 1/2 tsp baking powder
1 egg plus 1 egg white
1/2 tsp salt

Mix above ingredients except the butter in a large mixing bowl with a fork or pastry cutter until crumbly. Sprinkle crust over apple mixture. Melt the butter and pour evenly over crust. Sprinkle cinnamon over the top and bake at 350 for 30 minutes, then turn the heat up to 400 and let bake an additional 10-12 minutes.
I find that giving it the additional time at high heat really caramelizes the apples and browns the top nicely. Enjoy warm with whipped topping or ice cream!
Posted by Allison Holmes at 12:13 PM No comments:
Email ThisBlogThis!Share to XShare to FacebookShare to Pinterest
Labels: Desserts

Tuesday, November 24, 2009

Ultimate Pumpkin Swirl Cheesecake


What I'm bringing to Thanksgiving!

Ultimate Pumpkin Cheesecake

Crust:
12 ounces gingersnaps
1/2 cup chopped pecans
6 tablespoons melted butter
2 tablespoons brown sugar
Dash of salt

Filling:
4 (8 ounce) packages cream cheese (full fat, room temp.)
1 2/3 cups sugar
1/4 cup cornstarch
1 tablespoon vanilla
2 extra large eggs
3/4 cup heavy whipping cream
1 heaping cup fresh pumpkin puree
2 teaspoons pumpkin pie spice (plus some for sprinkling)
1 jar caramel topping
extra chopped pecans
extra crushed gingersnaps

Crush gingersnaps in a food processor (or a ziploc bag). Add chopped pecans, melted butter, brown sugar and salt and pulse (or mix) until combined. Press into a springform pan (9 or 10 in.) Chill for a half hour.

In a large mixing bowl beat cream cheese, sugar and cornstarch. Add vanilla . Blend in eggs one at a time, mixing well after each addition. beat in whipping cream, do not overmix.
Remove 1 1/2 cups pf batter and set aside. Gently blend in pumpkin and spice to remainder of batter.

Remove crust from fridge. Pour 1/2 container of caramel onto crust. Sprinkle with chopped pecans. Gently pour pumpkin batter on top of caramel and pecans. Drop small spoonfuls of plain batter and push slightly down. Swirl mixtures together in a figure 8 until swirls appear.

Place cheesecake in a water bath 1" high. Bake at 350 degree for 1 hour 15 minutes, check, if still soupy then bake an extra 15 minutes. Turn off oven and let cool for atleast 2 hours in the oven. Pour remaining caramel topping on top and crushed gingersnaps on top. Refridgerate for atleast 4 hours.
Posted by Allison Holmes at 7:25 PM No comments:
Email ThisBlogThis!Share to XShare to FacebookShare to Pinterest
Labels: Desserts, Special Occasions

Wednesday, October 14, 2009

Sesame Noodles


Simple Sesame Noodles
adapted from Pioneer Woman


I'm on a roll with Pioneer Woman's recipes right now! They always come out so tasty, I need to log these in so I don't loose them! They are definite keepers. I served this with broccoli and sauteed chicken.

12 ounces thin noodles, cooked and drained (angel hair, thin spaghetti, or Asian style)
1/4 cup soy sauce
2 tablespoons sugar
3 to 4 cloves garlic, minced
2 tablespoons rice vinegar
2 to 3 tablespoons pure sesame oil
1/2 teaspoon hot chile oil (more to taste)
4 to 5 tablespoons canola oil
2 tablespoons hot water
3 to 4 green onions, sliced thin

Whisk all ingredients (except noodles and green onions) together in a bowl. Taste and adjust ingredients as needed.
Pour sauce over warm noodles and toss to coat.
Sprinkle with green onions and toss.
Serve in a bowl with chopsticks. Yummy!

Posted by Allison Holmes at 7:34 PM 4 comments:
Email ThisBlogThis!Share to XShare to FacebookShare to Pinterest
Labels: Dinner, Pasta

Pumpkin Spice Muffins with Cream Cheese Frosting


Moist Pumpkin Spice Muffins (With Cream Cheese Frosting)
adapted from The Pioneer Woman

Muffins:

1 cup all-purpose flour
1/2 cup sugar
2 teaspoons baking powder
1 1/2 teaspoons cinnamon
1/4 teaspoon ground ginger
1/2 teaspoon nutmeg
1/2 teaspoon salt
4 tablespoons butter, cut into pieces
1 heaping cup pumpkin puree
1/2 cup evaporated milk
1 egg
1 1/2 teaspoons vanilla


2 tablespoons sugar
1 teaspoon cinnamon
1/4 teaspoon nutmeg

Preheat oven to 400 degrees. Generously grease 12 muffin tins.

Sift flour, sugar, baking powder, cinnamon, ginger, nutmeg, and salt. Cut in butter with two knives or a pastry blender until all incorporated. In a separate bowl, mix together pumpkin, evaporated milk, egg, and vanilla. Pour pumpkin mixture into the flour mixture. Add raisins. Fold gently until mixture is just combined. Pour into greased muffin pan—batter hardly ever fills all twelve unless you keep it down to 1/2 full. Sprinkle generous amounts of cinnamon-sugar over the top of each unbaked muffin.
Bake for 25 minutes. Allow to cool in pan for 15 minutes, then remove and allow to cool. Ice with cream cheese frosting.

Cream Cheese Frosting

1/4 cup softened butter
4 ounces cream cheese
1/2 pound powdered sugar
1/2 teaspoon vanilla

Mix all ingredients on high until soft and whipped. Spread onto completely cooled muffins, or place into a large pastry bag with a large star tip and go crazy!

Store in fridge, as icing will soften at room temperature.

Posted by Allison Holmes at 7:27 PM No comments:
Email ThisBlogThis!Share to XShare to FacebookShare to Pinterest
Labels: Breads, Breakfast, Desserts, Muffins

Tuesday, October 6, 2009

Pumpkin Pie Bites

I thought these mini pumpkin pie bites were too cute! Find the recipe here at Bakerella.com
Posted by Allison Holmes at 4:55 PM No comments:
Email ThisBlogThis!Share to XShare to FacebookShare to Pinterest
Labels: Desserts, Holiday Ideas

Saturday, October 3, 2009

Frosted Banana Bars


Frosted Banana Bars
adapted from allrecipes.com


I found this great recipe from a food blog that has the greatest recipes! I wish they had a Cafe Zupa's down here, now i'll just have to search one out on my next trip to Utah. Can't wait to try this one it looks wonderful!

Bars

1/2 cup butter, softened
1 1/2 cups white sugar
2 eggs
1 cup sour cream
1 teaspoon vanilla extract
2 cups all-purpose flour
1 teaspoon baking soda
1/4 teaspoon salt
1 cup mashed ripe banana

Preheat oven to 350F. Grease a 9×13 inch pan.

In a large bowl, cream together the butter and the sugar until smooth. Beat in the eggs, one at a time, then stir in the sour cream and vanilla. In a separate bowl, combine the flour, baking soda and salt; stir into the wet batter. Finally, mix in the mashed banana. Spread evenly into the prepared pan.

Bake for 25 to 30 minutes, or until a toothpick inserted in the middle comes out clean. Allow the bars to cool completely before frosting.

Cream Cheese Frosting

1/2 cup butter, softened
1 8-ounce package cream cheese, softened
1 lb. powdered sugar

In a bowl, combine the butter and cream cheese. Beat until smooth. Slowly add the powdered sugar and mix until completely smooth.

Posted by Allison Holmes at 1:57 PM 1 comment:
Email ThisBlogThis!Share to XShare to FacebookShare to Pinterest
Labels: Desserts

Friday, September 11, 2009

BBQ Chicken Pizza


BBQ Chicken Pizza

12" pizza dough (my fav is from Fresh and Easy, seriously so good and easy!)
3 Tbsp. bbq sauce (I like Sweet Baby Ray's)
3 Tbsp. ranch dressing

Roll out dough into a 12 inch circle and transfer onto a greased pizza stone or pan. Mix Bbq sauce and ranch together and spread on to unbaked crust.

1 cooked and shredded chicken breast (I season with garlic salt pepper, etc whatever is in the cupboard!)
1 small diced tomato
1 c. fresh spinach
1/2 c. sweet onion (I used red onion)
2 Tbsp. fresh chopped cilantro
2 slices turkey bacon, chopped
A few squirts of Bbq sauce, eyeball it.

Mozzarella or pepper jack cheese

Combine these ingredients, except for the cheese, in a bowl and mix until blended. Pour on top of crust. Sprinkle cheese on top of toppings and place in a preheated oven. (425 for 15 minutes)

You can sprinkle some more fresh cilantro on top before serving
Posted by Allison Holmes at 8:25 PM 1 comment:
Email ThisBlogThis!Share to XShare to FacebookShare to Pinterest
Labels: Dinner, Pizza

Friday, September 4, 2009

My Favorite Steak Topper

So easy, so delicious, period! I know most of the recipes for this sauce uses some kind of wine in a reduction but it tastes perfectly fine without it. Goes perfectly with the marinade recipe on the previous post.

Mushroom and Onion Steak Sauce
1 cup sliced onions
1 cup mushrooms
3 Tbsp. butter
1/3 c. sour cream (or heavy cream)
salt and pepper to taste

Place butter onions and mushrooms in a shallow saucepan, cover and cook on low for about 7-8 minutes, or until almost softened. Uncover, turn the heat up to med./high and saute until carmelized, maybe another 7-8 min or so, stirring occasionally to prevent the bottom from sticking. Lower heat to low again and add the salt and pepper and sour cream (or heavy cream) to saucepan, mix until combined and cook for an additional couple minutes. Perfect time to whip up your steaks while this is cooking!
Posted by Allison Holmes at 10:20 PM No comments:
Email ThisBlogThis!Share to XShare to FacebookShare to Pinterest
Labels: Dinner, Side Dish

Thursday, August 20, 2009

My Favorite Steak Marinade

I've got real love for my BBQ... some might even say I am a better griller then the hub... I know don't tell him I saide that! haha This is a savory sweet marinade that on the right cut of meat (look for good marbled swirls) will just melt in your mouth! Yum I seriously can't wait to throw it on the fire again.

Teriyaki Marinade
  • 2 tablespoons soy sauce
  • 2 tablespoons water
  • 1 tablespoon white sugar
  • 1 1/2 teaspoons honey
  • 1 1/2 teaspoons Worcestershire sauce
  • 1 1/4 teaspoons distilled white vinegar
  • 1 tablespoon olive oil
  • 1/4 teaspoon onion powder
  • 1/2 teaspoon minced garlic
  • 2 tablespoons teriyaki sauce/marinade
  • 2 (6 ounce) lean beef rib eye steaks (I used a thin cut flank steak)

  1. Whisk together the soy sauce, water, sugar, honey, Worcestershire sauce, vinegar, olive oil, onion powder, garlic, and teriyaki sauce in a large bowl. Pierce steaks several times with a fork. Marinate steaks in soy sauce mixture for at least 2 hours.
  2. Grill the steaks over medium heat; 7 minutes per side for medium. An instant-read thermometer inserted into the center should read 140 degrees F (60 degrees C).
Posted by Allison Holmes at 1:24 PM No comments:
Email ThisBlogThis!Share to XShare to FacebookShare to Pinterest
Labels: Dinner

Lemon Sugar Crusted Blueberry Muffins

I wasn't to wild and crazy about the first blueberry muffin recipe I posted on here so I am hoping this one is up to par. I am sure it will taste fine with frozen berries but to me fresh tastes so much better and doesn't overwhelm the batter with excess juice and water. Plus I can't wait to try baking them with my vanilla bean infused sugar (which is making everything I bake with extra vanilla-y and yummy!) I love the paring of zesty lemon and the mild blueberries in this recipe. But I'll probably half it since my hub isn't a muffin lover.


Lemon Sugar Crusted Blueberry Muffins
adapted from Cook's Illustrated


Muffins:
2 cups fresh blueberries
1 1/8 cups (8 ounces) plus 1 teaspoon sugar
2 1/2 cups (12 1/2 ounces) all-purpose flour
2 1/2 teaspoons baking powder
1 teaspoon salt
2 large eggs
4 tablespoons butter, melted and cooled slightly
1/4 cup oil (vegetable or canola)
1 cup buttermilk
1 1/2 teaspoons vanilla extract


Lemon-Sugar Topping:
1/3 cup sugar
zest from one lemon


For the topping, stir together sugar and lemon zest in a small bowl and set aside.

For the muffins, preheat oven to 375 degrees. Spray a standard muffin tin with nonstick cooking spray. Rinse one cup berries under cold water and spread on a double layer of paper towels to dry well. Bring remaining one cup berries and 2 teaspoon sugar to simmer in a small saucepan over medium heat. Cook, mashing berries with a spoon several times and stirring frequently, until the berries have broken down and the mixture is thickened and reduced to about 1/3 cup, about 6-8 minutes. Transfer to a small bowl and cool to room temperature, about 10 to 15 minutes.

Whisk the flour, baking powder, and salt together in a large bowl. Toss the berries that have dried on the paper towels in with the flour mixture. Whisk remaining 1 1/8 cups sugar and eggs together in a medium bowl until thick, about 45 seconds. Slowly whisk in the butter and oil until combined. Whisk in the buttermilk and vanilla until combined. Using a rubber spatula, fold egg mixture into flour mixture until just moistened. The batter will be lumpy with a few dry spots of flour - don't overmix. This is the key to moist and tender muffins.

Using ice cream scoop or large spoon, divide the batter equally among prepared muffin cups (batter should completely fill the cups). Spoon a teaspoon of cooked berry mixture into the center of each mound of batter. Using a skewer (or toothpick or dry spaghetti strand), gently swirl the berry filling into the batter using a figure eight motion. Sprinkle lemon sugar evenly over the muffins.

Bake until the top of the muffins are golden and just firm, 17-18 minutes. Cool muffins in the muffin tin for 5 minutes, then transfer to a wire rack and cool 5 minutes before serving.
Posted by Allison Holmes at 12:54 PM No comments:
Email ThisBlogThis!Share to XShare to FacebookShare to Pinterest
Labels: Breakfast, Muffins

Saturday, August 1, 2009

Knock yer socks off Zucchini Cakes


Since I don't have a garden myself (still traumatized by the tomato worms of '07!) I am glad that I have great friends with even greater gardens! A great way to use up all those zucchini's you got lying around!
Also try this great chocolate zucchini bread recipe, which is indeed more like a cake and is ta-die-for :)

I made these last night for dinner with some steaks. They were really super tasty. I'll definitely be making these again. These taste great by themselves, with spaghetti sauce or ranch dressing.
Keep bringing on the good stuff PW!

Zucchini Cakes
Makes 1 dozen cakes

1 large zucchini
1 Tbsp. minced garlic
3/4 cup Progresso bread crumbs
1/2 cup Parmesan cheese
2 eggs
Salt
Pepper
Olive oil

Wash and cut ends off zucchini. Shred zucchini with the large holed side of a cheese grater. Squeeze the zucchini shreds in a paper towel to remove as much moisture as possible.
Combine zucchini, garlic, bread crumbs, cheese, eggs in a medium bowl. Add salt and pepper to taste. Stir until well mixed.

Heat olive oil in a shallow skillet (with oil being about 1/4 inch deep). When the oil is nice and hot, place a glob of zucchini into the oil and flatten slightly. Cook each side about 2 minutes each or until nice and browned.
Posted by Allison Holmes at 12:27 PM No comments:
Email ThisBlogThis!Share to XShare to FacebookShare to Pinterest
Labels: Appetizer, Side Dish

Thursday, July 30, 2009

Dark Chocolate Molten Lava Cake


I got this recipe off of Pioneer Woman's new recipe collection Tasty Kitchen. It was a super horrible bad idea for me to log onto that site last night at 10pm with a wicked chocolate craving.
I halved the recipe but being tired and addiction crazed I used just regular unsweetened baking cocoa and double the sugar without realizing it. Fortunately it turned out really good and I went to bed much happier.

So if you like a not so sweet cake use unsweetened baking cocoa (3 tbsp + 1 Tbsp oil = 1 square (oz) of baking chocolate, and double the sugar. (I also had to add 1 Tbsp. milk to thin it out a bit) But if not stick to the original recipe.

It also tastes wonderful for breakfast the next day...

Please don't judge me.


Molten Chocolate Cake
Makes 4 servings

  • 4 pieces (squares) Semi-sweet Baking Chocolate
  • ½ cups Butter
  • 1 cup Powdered Sugar, plus extra for dusting
  • 2 whole Eggs
  • 2 whole Egg Yolks
  • 6 tablespoons Flour
You can serve this with whipped topping or the much better tasting homeade version:
  • 2 cups Real Whipping Cream (seriously It's So Much Better!!!)
  • 2 tablespoons Sugar

Preheat oven to 425 degrees.

Spray 4 custard cups with Pam and place on cookie sheet.

Microwave chocolate and butter in large bowl on high for about 1 minute, until butter is melted. whisk until chocolate is also melted.

Stir in sugar until well blended. Whisk in eggs and egg yolks. Stir in flour.

Divide between cups.

Bake 13-14 minutes until sides are firm and center is soft. Let stand 1 minute.

Dust with powdered sugar

Combine sugar and heavy cream and whip until stiff.

Invert cakes on dishes and top with whipped cream.

Posted by Allison Holmes at 12:23 PM No comments:
Email ThisBlogThis!Share to XShare to FacebookShare to Pinterest
Labels: Chocolate, Desserts

Easy Peasy Poppyseed Chicken Casserole


This is one of my safe go-to dishes that tastes great and is super easy to make. It also makes great leftovers!

3 cups of cooked white rice (sometimes I use garlic rice)
2 cooked chicken breasts, shredded (I just steam them in a shallow pan with seasonings)
1 can of cream of chicken soup
1 small container sour cream (I've also used ricotta cheese and cream cheese)
1 Tbsp. poppy seeds
1/2 tsp. pepper
1 sleeve Ritz cracker crumbs (just smash inside sleeve, inside a ziploc bag)
5 Tbsp. butter melted

Preheat oven to 375
Mix together in a small bowl; cream of chicken soup, sour cream, pepper and poppy seeds. Place aside.
In a greased 9 x 13 baking dish place rice as bottom layer. Next, arrange shredded chicken over rice until rice is completely covered. Pour sour cream mixture over chicken, until chicken is completely covered. Sprinkle Ritz crumbs over the entire casserole. Pour melted butter slowly over cracker crumbs so cracker crumbs are moistened. Bake for 25 minutes.
Posted by Allison Holmes at 11:56 AM 1 comment:
Email ThisBlogThis!Share to XShare to FacebookShare to Pinterest
Labels: Chicken, Dinner

Monday, July 27, 2009

Summer Potato Salad


I've had to rack my brain to get this recipe written down... it's hard you know. I can't exactly write "put 2 giant blobs of dijon and however many potatoes your biggest stockpot will hold..." well you get the point. So please excuse me for the short hand recipe. I love potato salad yet my husband loves it so much more. So it's quite the staple over summer while we are 90% BBQ'ing around here (probably why there has been a shortage of posts going on around here! Just staying cool and falling back on my usual recipes I guess!) I really prefer the taste of red potatoes in this salad then regular baking potatoes. They give it a more unique mild flavor.

3 lbs. new red potatoes (about 10?)
1 1/2 cup mayonnaise (got to be the full fat stuff!)
3 Tbsp. Grey Poupon dijon mustard
1 Tbsp. yellow mustard
1 Tbsp. white vinegar (or whatever kind ya got)
2 Tbsp. prepared sweet relish
1 Tbsp. sugar
1 tsp. garlic salt
4 hard cooked eggs, chopped
5 slices cooked bacon
1/2 c. green onion
3 Tbsp. very finely chopped vidalia (sweet) onion
1/2 c. chopped celery
Salt and pepper

Boil potatoes in a large pot with salt water until tender firm (about 20 min?) Cool and drain. Chop into 1 inch cubes. Place in a large bowl, set aside.

In a medium bowl combine mayo, mustard, dijon, vinegar, relish, sugar, garlic salt. Stir until incorporated. Add chopped onion, green onion, and celery, bacon and eggs. Salt and pepper to taste.

Add mayo mixture to the potato cubes and combine. Dust with paprika if desired and refrigerate for at least 2 hours.
Posted by Allison Holmes at 4:48 PM No comments:
Email ThisBlogThis!Share to XShare to FacebookShare to Pinterest
Labels: Salads, Side Dish

Sunday, July 12, 2009

Strawberry Cream Pie


I'm making this for a small get together at a friends house tomorrow night... I can't wait to see how it turns out!

For the crust:
Please don't cheat and buy a pre-made crust! They taste like junk and this one is so easy to make :)

1 1/4 cups graham cracker crumbs (1 pkg crushed)
1/4 cup granulated sugar
5 Tablespoons melted margarine or butter

Mix above ingredients together. Using the back of a large spoon, press crumb mixture firmly on bottom and up sides of a 9 inch pie plate. Bake crust at 350 degrees for 6 to 8 minutes, or until light golden brown. Cool then fill.

Cream Cheese Mixture:
1 small pkg Cream Cheese (3 1/2 oz.)
1 1/4 cups powdered sugar
1 cup Cool Whip
(I buy a small cool whip, you will use the rest for the top of pie)

Beat Cream Cheese with hand mixer, until smooth. Blend in Powdered sugar until smooth. Blend in the cool Whip. Fill Cooled Pie shell with Cream Mixture on bottom and almost to the top of crumb shell. Refrigerate while preparing berry mixture.


Berry Topping:
1 1/2 to 2 cups of sliced or whole Strawberries
1 pkg Strawberry Danish junket (4 3/4 oz.)
It's close to the jello in the grocery store)
1 3/4 cups COLD Water

Stir contents of junket pkg into 1 3/4 cups cold water in medium saucepan. Bring to a full boil or medium heat, stirring constantly. Boil for one good minute. The Berry sauce, will darken in color after that minute. Cool slightly, and then add your sliced or whole berries. Pour Berry Sauce over the top of Cream mixture, being careful, not to cover the tops of the graham cracker crust completely. It will make your crumbs soft. Cool in the fridge until pie is well set. Top with additional Cool Whip if desired. Enjoy! So simple.
Posted by Allison Holmes at 9:35 PM No comments:
Email ThisBlogThis!Share to XShare to FacebookShare to Pinterest
Labels: Desserts

Friday, July 3, 2009

Watermelon Lemonade

Hey. I'm a slacker. They say the first step toward recovery is admitting you have a problem. Hello. I am Allison. I don't keep up on my blog. There. I feel better.
Walah... and since I am instantly forgiven I would love to share this recipe with you put out by Smitten Kitchen. Loooove them! Just in time for summer too!


Makes one pitcher of lemonade.

1 cup (8 ounces) fresh-squeezed lemon juice
2 cups (16 ounces) fresh watermelon puree, strained through a coarse strainer to remove seeds
3/4 cup (6 ounces) simple syrup*
3 cups (24 ounces) cold water

Stir it all together and serve over ice. Garnish it with a thin watermelon or lemon wedge, if you’re feeling fancy.

Spritzy variation: I have never met a beverage I didn’t think would taste better bubbly, thus, if you’re looking for a spritzier version of this, swap one-third (1/4 cup) or more of the water with seltzer or sparkling water.

Boozy variation: My husband thinks this would taste even better with a splash of vodka. I am not one to argue.

* Make your own simple syrup: Please. I see it sold in stores and it just boggles my mind. Simmer one part water with one part sugar (I did a cup of each and ended up with more than I needed for a quadruple batch) until sugar has dissolved. Let cool. Or, you can use my speedier method where you simmer one part sugar with half as much water and once it has dissolved, add the second half of the water, cold, which cools the mixture down faster (when you like nothing to slow your pace to the nearest mocktail).

Posted by Allison Holmes at 9:50 PM No comments:
Email ThisBlogThis!Share to XShare to FacebookShare to Pinterest
Labels: Drinks

Saturday, June 13, 2009

I'm Back!

Whew...what a vacation! If you are interested in seeing some pics you can check out my family blog here. Now if I can just get in to the swing of things again I'll be back to posting recipes shortly :)
Posted by Allison Holmes at 3:54 PM No comments:
Email ThisBlogThis!Share to XShare to FacebookShare to Pinterest

Saturday, May 23, 2009

Off to Maui!

The wait is finally over! We are leaving for 2 weeks on Monday - flying out to MAUI!! Wooot I can't wait :) No posts until I get back...this is because I will be so busy stuffing my face with-

and

and

Can't wait to try out the local cuisine and friut stands!
Posted by Allison Holmes at 9:57 AM No comments:
Email ThisBlogThis!Share to XShare to FacebookShare to Pinterest

Monday, May 18, 2009

Reese's Pieces PB Cookies


Two of my favorite things combined and making some magic together...hmmm I seem to say that alot, I guess I have a lot of favorites! Food in general is my favorite I suppose :P

1/2 cup granulated sugar
1/2 cup packed brown sugar
1/2 cup peanut butter
1/2 cup butter or margarine, softened
1 egg
1 1/4 cups all-purpose flour
1/2 teaspoon baking soda
1/2 teaspoon baking powder
1/4 teaspoon salt
1 cup Reese's Pieces

Mix both sugars, peanut butter, and butter. Separately - mix flour, baking soda, baking powder and salt. Combine both sets of ingredients and add Reese's Pieces. Bake at 350 for ten minutes, or until edges are slightly starting to brown. REMEMBER! A cookie that looks done is an over cooked cookie! So don't be afraid when the middle is slightly doughy, it'll finish baking while they are cooling off.
Posted by Allison Holmes at 2:27 PM 1 comment:
Email ThisBlogThis!Share to XShare to FacebookShare to Pinterest
Labels: Cookies, Desserts

Chicken and Spinach Calzones

Mmmm these looked so yummy - the only thing I would change is to make your own alfredo sauce (find the recipe HERE) instead of buying a jar of store bought stuff. It's yucky and gross and the homeade sauce will just knock your socks off.
*photo courtesy of Christy's Kitchen Creations.

Chicken Spinach Calzones

3 chicken breasts, chopped
1 (10-ounce) bag fresh spinach
1 (16-ounce) jar prepared Alfredo sauce
1 (8-ounce) package sliced provolone cheese, diced
1 (8-ounce) package fresh basil
About 1 cup cooked mushrooms (I omitted)
2 tablespoons minced garlic
1 teaspoon kosher salt
1 teaspoon ground black pepper
3 (13.8-ounce) cans refrigerated pizza dough
Prepared marinara sauce and pesto sauce (optional)
Garnish: fresh basil

Preheat oven to 425 degrees. Line a baking sheet with parchment paper; set aside.

In a large bowl, combine chicken, spinach, Alfredo sauce, cheese, basil, mushrooms, garlic, salt and pepper.

Unfold one can of dough onto prepared baking sheet. gently stretch or roll into an 11-inch square; cut in half diagonally, forming two triangles. Place about 1 1/2 cups chicken mixture in the center of the triangle, leaving a 1-inch border on each side. Fold 1 side of triangle over filling, rolling up edges of dough to seal. Cut a small slit in top of calzone to allow steam to escape. Repeat with remaining dough and chicken mixture. Bake for 15 minutes or until golden brown. Serve with marinara sauce and pesto sauce, if desired. (The marinara was fantastic with these!!) Garnish with fresh basil, if desired.
Posted by Allison Holmes at 2:10 PM No comments:
Email ThisBlogThis!Share to XShare to FacebookShare to Pinterest
Labels: Chicken, Dinner

Thursday, May 14, 2009

Whopper Bars


Found this recipe here. Baking Cakes Galore is a really fun baking blog chock full of yummy desserts. It is a UK blog, so I tried to convert all the ingredients accurately. I'm going to try this one if not tonight then tomorrow, I have been totally craving Whoppers lately and I definitely wanted this one to put in the vault.


Chocolate cake:
3/4 cup unsalted butter, cut into cubes
3/4 cup (6 oz) good quality baking chocolate, broken up into squares
1 3/4 cup granulated sugar
2 tsp vanilla extract
4 large eggs, lightly beaten
1 1/4 flour
½ tsp baking powder
½ tsp salt

Malted Milk Topping:
1/2 cup malted milk powder
3 tbsp milk
1 tsp vanilla extract
3 Tbsp butter
1/2 cup plus 2 Tbsp powdered sugar
3/4 cup whoppers, roughly chopped

Use a 13x9 baking pan lined with foil (over lapping at each long side with foil) grease foil. (optional)

Method

Preheat oven to 350°F

For the chocolate base: In a small bowl combine the flour, salt and baking powder set aside for later.

In a large saucepan melt the butter and chocolate stirring frequently. Remove from the heat and stir in the sugar and vanilla extract. Beat in the eggs until blended in and then lastly the flour mixture until it’s fully combined. Spread the mixture over the prepared baking tin levering the top with a spatula. Place into the preheated oven and bake for 25 – 30 minutes or until a skewer inserted into the centre comes out clean. Cool in the pan on a wire rack.

For the malted milk topping: In a small bowl stir together the malted milk powder, milk and vanilla extract until combined into a smooth mixture. In another bowl, add the butter and powdered sugar and beat together until blended, add to the malted mixture and beat together.

When the chocolate base is nearly cold spread all the malted topping over with a spatula until fully covered and then top with the chopped whoppers. Let set and slice into bars.
Posted by Allison Holmes at 12:49 PM No comments:
Email ThisBlogThis!Share to XShare to FacebookShare to Pinterest
Labels: Desserts

Friday, May 8, 2009

Happy Mother's Day!


I know it's not Mother's Day...yet, but I won't be posting until Monday, we have a full 2-day Mother's Day fiasco going on out here...busy busy busy! This is what I am bringing for dessert for my mom on Sunday. I can't think of a more perfect dessert on a HOT spring (although it already feels like summer) day lounging by the pool with my mom and family.

You can find my own adapted homeade ice cream recipe here.
I'll serve it with this pie which is seriously sooo yummy. To lighten it up a bit I'll use Neufchatel cheese, fat free milk, and light whipped topping.

Strawberry Pina Colada Pie

Crust:
2 cups graham cracker crumbs (whirl around until fine in food processor)
3 Tbsp. sugar
6 Tbsp. completely melted butter

Mash together (I just use my hands) until blended and mold into a 9 in. pie pan. Cook for 8 min. at 350. Let cool.


1 pkg. (8 oz.) cream cheese, softened
1/4 cup milk
1 pkg. (4-serving size) instant vanilla pudding
1 can (8 oz.) crushed pineapple in juice, undrained
1 tub (8 oz.) whipped topping, thawed, divided
1/4 cup coconut, toasted (throw in oven at 350 for a couple minutes. Keep watching so it doesn't burn, just let it get nice and light toasty brown)
1-1/4 cups sliced fresh strawberries

BEAT cream cheese and milk in large bowl with electric mixer until well blended. Add dry pudding mix and pineapple; mix well. Gently stir in 2 cups of the whipped topping; spoon into crust.

REFRIGERATE 3 hours or until firm.

TOP with coconut, strawberries and remaining whipped topping just before serving. Store leftovers in refrigerator.

Posted by Allison Holmes at 4:31 PM No comments:
Email ThisBlogThis!Share to XShare to FacebookShare to Pinterest
Labels: Desserts

Wednesday, May 6, 2009

Smashed Potatoes

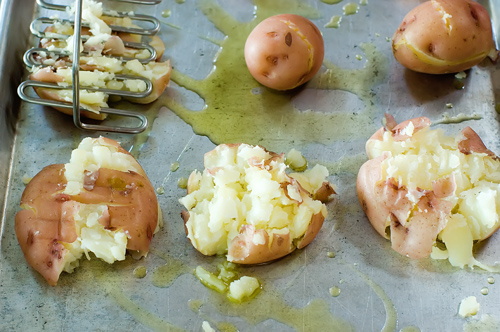
I make these babies up at least twice a week or more (it's what I get for buying a gazillion pound bag of potatoes at Costco) So good! (Pictures courtesy of Mrs. Fabulous herself, The Pioneer Woman)

What you need: Red potatoes, olive oil, salt, pepper, cheddar cheese (optional)

Take however many red potatoes you want to make (I usually do 6 for the 3 of us), put them in a deep pot of water. Boil them just until they can be pierced easily with a fork (20+ min??)

Place hot potatoes on a cooking sheet and smash them with a potato masher.


Generously brush the tops of smashed potatoes with olive oil. Generously sprinkle with salt and pepper. That's it! Easy Peasy - now just put them in the oven at 450 degrees for 20-25 minutes or until they look crispy and golden. Then I put a sprinkling of cheddar cheese over each one, but they taste great without cheese too.


Posted by Allison Holmes at 5:16 PM 2 comments:
Email ThisBlogThis!Share to XShare to FacebookShare to Pinterest
Labels: Side Dish

Monday, May 4, 2009

Garlic Rice


So I made cream cheese chicken two nights ago...dang that stuff was GOOD. I served over garlic rice and I just wanted to include that recipe here.

Garlic Rice

1 cup long grain rice (not instant)
1 1/2 Tbsp olive oil (although any cooking oil will do)
1 tsp minced garlic packed in olive oil (approx. 2 cloves minced)


Love this stuff! Ultimate time and smelly hand saver!

Put rice, oil, and garlic in a large shallow saucepan and saute on med/high heat for about 5-7 minutes stirring frequently, until rice starts browning. Add-

1 14 oz can chicken stock/broth
1 cup water
2 Tbsp. butter

Put a lid on it and turn heat on low. Cook for about 20 min or until liquid is fully absorbed. Try not to stir it until it is completely done to avoid sticky rice. Optional: Serve with chopped green onion


Posted by Allison Holmes at 11:41 AM 1 comment:
Email ThisBlogThis!Share to XShare to FacebookShare to Pinterest
Labels: Appetizer, Rice, Side Dish

Saturday, May 2, 2009

My Fav CCC Recipe


I posted this a while back on my family blog. It's my adaptation of the perfect chocolate chip cookie. I know, I know - these CCC recipes are everywhere!! Everyone claiming to have the BEST recipe. I'll just say this cookie does not disappoint. You can check out my previous post here on how to adapt your fav CCC recipe too!

{Original Post}
Everyone has a favorite chocolate chip recipe...and this is mine.They are my absolute fav because they are very moist and chewy (and they stay that way!) as chocolate chip cookies should be and they don't go flat after you cool them. Let me know what you think if you happen to whip these little babies up. Happy Baking!

1 stick (1/2 C) butter (room temp.)
1/2 C. butter flavored Crisco (room temp.)
1 1/8 C. brown sugar
1/2 C sugar
1 Tbsp. vanilla
2 eggs
2 1/2 C flour
1 tsp baking soda
3/4 tsp baking powder
Dash of salt
1 1/2 C chocolate chips (more or less depending on how much you prefer)
*(Ive tried different chips and the Ghirardelli semi sweet ones taste the BEST!)


Preheat your oven to 350 degrees. Beat the butter, and Crisco, both sugars, and vanilla until creamy. Add eggs and beat for about a minute. Add flour, baking soda, baking powder and salt with a large spoon. Fold in chips. Spoon onto cookie sheets and bake for 6-7 minutes. The cookies will not look entirely done in the middle but take them out anyways! Cool and serve

This is also excellent made with white chocolate chips and macadamia nuts!
Posted by Allison Holmes at 4:36 PM No comments:
Email ThisBlogThis!Share to XShare to FacebookShare to Pinterest
Labels: Cookies, Desserts

Cream Cheese Chicken

Making this one tonight. I think I'll serve it with some garlic rice. We'll see how it goes, I'll return and report (and hopefully have a pic if I don't forget) While your surfing you can check out another great cooking blog here.
Oh yeah, you may see some recipe repeats... what can I say, she makes good food so I steal her secrets!! Thanks for all the great recipes Lettie :)

Cream Cheese Chicken


4 boneless skinless chicken breasts
1 package dry Italian dressing mix
1/2 cup water


Cook these ingredients for 4 hours on low in your crock pot.
Then add:


8 oz. Cream Cheese
1 can Cream of Chicken soup


Cook one more hour on low or until sauce is bubbly. If sauce is too thick add more water!
Serve over Rice, Mashed Potatoes, or Noodles
Posted by Allison Holmes at 4:26 PM 1 comment:
Email ThisBlogThis!Share to XShare to FacebookShare to Pinterest
Labels: Chicken, Dinner, Slow Cooker

Must Try Cheesecake

I found this recipe here, this is not my picture but doesn't it look absolutely amazing?? Now wipe up the drool from your keyboard, and let's go get our cheesecake on! The Bryce-man always asks and bugs me about why I don't make cheesecakes anymore. And I kindly said "Sweetheart, the man that I love, I'll tell you why!" There is only 2 of us around here you know. 2 sweet toothed foodies + 1 giant cheesecake = The reason I gained 10 pounds the first year we were married. Helloooo, why do you think I don't make them anymore? Are we not going to Maui this month and you want me to make what??? Sigh...but he is so cute when he begs and I'll most likely give in to my own cravings anyways... and I think this is the one I am going to try next, you know to get some peace and quiet around here. Momentarily that is.

She has topped hers with a chocolate ganache, you can whip your own up with good chocolate, heavy cream and butter.


Crust
20 Oreo cookies or similar chocolate sandwich cookie, crushed fine
1/4 cup melted butter + 2 Tbsp.


Cheesecake
6 sticks of cream cheese, 8 oz each, room temperature
2 cup sugar
5 large eggs
1 cup sour cream
1 tbsp. lemon juice
1 tbsp. vanilla extract
1/2 c. melted quality dark chocolate

DIRECTIONS:
1. Preheat oven to 350 degrees . Begin to boil a large pot of water for the water bath.

2. Mix together the crust ingredients and press into your preferred pan. You can press the crust just into the bottom, or up the sides of the pan too - baker's choice. Set crust aside.

3. Combine cream cheese and sugar in the bowl of a stand-mixer (or in a large bowl if using a hand-mixer) and cream together until smooth. Add eggs, one at a time, fully incorporating each before adding the next. Make sure to scrape down the bowl in between each egg. Add sour cream, vanilla, lemon juice, and vanilla and blend until smooth and creamy.

4. Pour 1/2 of batter into prepared crust and tap the pan on the counter a few times to bring all air bubbles to the surface. Add melted chocolate to remanding batter and mix until fully blended. Pour into the middle of the pan, on top of the plain batter. Place pan into a larger pan and pour boiling water into the larger pan until halfway up the side of the cheesecake pan. If cheesecake pan is not airtight, cover bottom securely with foil before adding water.

5. Bake 45 to 55 minutes, in the shallow water bath, until it is almost done - this can be hard to judge, but you're looking for the cake to hold together, but still have a lot of jiggle to it in the center. You don't want it to be completely firm at this stage. Close the oven door, turn the heat off, and let rest in the cooling oven for one hour. This lets the cake finish cooking and cool down gently enough so that it won't crack on the top. After one hour, remove cheesecake from oven and lift carefully out of water bath. Let it finish cooling on the counter, and then cover and put in the fridge to chill. Once fully chilled, it is ready to serve.
Posted by Allison Holmes at 8:45 AM No comments:
Email ThisBlogThis!Share to XShare to FacebookShare to Pinterest
Labels: Desserts

Thursday, April 30, 2009

The Best Apple Dip. Period.

I have a friend who is starting up a food blog and has a great recipe for a fruit dip, you can find it here. So anyways it had me thinking about my favorite dips and things and I remembered this caramel dip I made for a UFC party and my daughters birthday party. Let's just say there is no such things as left overs with this dip.


  • 16 individually wrapped caramels, unwrapped
  • 1/4 cup water
  • 1 (8 ounce) package cream cheese
  • 1/2 cup brown sugar
In a medium saucepan over medium-low heat, or in the microwave, melt caramels with water, stirring frequently. Remove from heat. In a medium bowl, cream together cream cheese and sugar with a hand mixer. Fold in caramel mixture. Serve immediately.
Posted by Allison Holmes at 5:54 PM No comments:
Email ThisBlogThis!Share to XShare to FacebookShare to Pinterest
Labels: Appetizer, Fruit Dip

Wednesday, April 29, 2009

Frozen Limeade Punch

I had this punch at a bridal shower recently. It is seriously to die for and perfect for a hot summer day. They serve a drink similar to this one at Red Robin and they put raspberry syrup and blueberries in it. Loooove at first sight...I'm a believer!

5 1/2 qt. water (22 cups)
1 c. frozen limeade concentrate
3 cups of sugar
1 large bottle Sprite/7up/Sierra Mist

Mix water, until the limeade and sugar are completely dissolved. Pour drink mix into gallon size freezer Ziploc bags (each about 2/3 way full, sealed tightly) and freeze until completely frozen (over night). When ready to serve punch, smash bags on hard surface to loosen up frozen drink mix and pour into punch bowl. Pour bottle of soda over it and mix until nice and slushy.
Posted by Allison Holmes at 4:16 PM 1 comment:
Email ThisBlogThis!Share to XShare to FacebookShare to Pinterest
Labels: Drinks

Water Punch

I love to serve this punch at family get togethers, summer bbq's, as well as baby and bridal showers. It is a lighter tasting punch with a great pop of color from the floating citrus fruit. You can get powdered citric acid from any pharmacy or health food store.

5 qt. water
3 c. sugar
1 Tbsp. lemon extract
1 Tbsp powdered citric acid
Ice
lemons, limes, and oranges (about 2 or 3 each)

Dissolve the water and sugar together. Add lemon ext. and citric acid and stir until completely dissolved. Add ice. Cut up citrus fruits in slices and place on top.
Posted by Allison Holmes at 3:46 PM No comments:
Email ThisBlogThis!Share to XShare to FacebookShare to Pinterest
Labels: Drinks

Tuesday, April 28, 2009

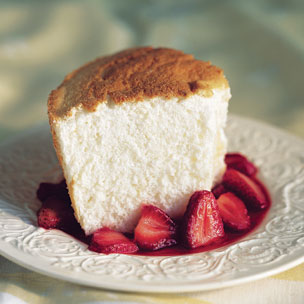
Angel Food Cake with Strawberries and Whipped Cream


My absolute favorite thing that I am craving going into summer is angel food cake. I got this recipe from Williams Sonoma, I've been wanting to make one from scratch. In the past I have taken the easy route and made one from a box, so we'll see how it goes. I know there is a TON of egg whites in here, but it's the yolk that's got all the cholesterol and fat...ahhh but I hate waste...I'll have to find some other recipe now that just calls for yolks!
After the cake is cooled I hull and cut about 20 strawberries or so and add about 1-2 tbsp of water and some sugar (add to taste - at least a couple of Tbsp.) and I smash the crud out of them with a potato masher (lol! I know but it's all I have!) Then in a separate bowl I whip up about 1/2 cup heavy whipping cream (add 1 tbsp sugar and 1/2 tsp vanilla) use a handheld mixer and whip it until consistency of cool whip (do not over mix though or cream will curdle)

I have to find a good recipe for some lemon curd, I was at a dinner and they served angel food cake with warm lemon curd and it was heavenly! Just another idea for ya :)


Eggs are easier to separate when they are cold. Carefully crack the egg and, holding it over a bowl, pass the yolk back and forth between the shell halves and let the whites fall into the bowl. Drop the yolk into a separate bowl, then transfer the whites to a third bowl. Separate each additional egg over an empty bowl, for if any speck of yolk gets into the whites, the whites will not whip up properly. If a yolk breaks, start fresh with another egg. Let the separated egg whites come to room temperature before using them in the batter.

Ingredients:

1 cup cake flour

1 1/4 cups superfine sugar

1/4 tsp. salt

1 1/4 cups egg whites (from about 10 eggs)

1 1/2 tsp. cream of tartar

2 tsp. fresh lemon juice

1 tsp. vanilla extract

1 tsp. finely grated lemon zest

Fresh berries for serving

Confectioners' sugar for dusting

Directions:

Preheat an oven to 350°F. Line a 10-inch angel food cake pan with parchment paper.

Sift together the flour, 1 cup of the superfine sugar and the salt three times; set aside.

In the bowl of an electric mixer fitted with the whisk attachment, beat the egg whites on medium-low speed until foamy. Add the cream of tartar, increase the speed to medium-high and beat until the whites are soft and foamy. Gradually add the remaining 1/4 cup superfine sugar and beat until medium-firm peaks form when the beaters are lifted. Do not overbeat. Stir in the lemon juice, vanilla and lemon zest.

Transfer the egg mixture to a very large bowl. Sift one-fourth of the flour mixture over it and, using a rubber spatula, gently fold it into the whites using deep strokes. Add the remaining flour mixture in three equal additions, sifting and folding each time.

Scoop the batter into the prepared pan and gently smooth the top. Bake until the cake is golden and springs back when touched, about 40 minutes. Remove from the oven and invert the pan onto its feet or the neck of a wine bottle. Let cool completely.

Gently run a long, thin-bladed knife around the outer sides of the pan, pressing it firmly against the pan to prevent tearing the cake. Then run the knife or a skewer around the inside of the tube. Invert the pan and let the cake slide out. Remove the paper lining. Garnish with berries and dust with confectioners' sugar. Serves 10.

Adapted from Williams-Sonoma Collection Series, Dessert, by Abigail Johnson Dodge (Simon & Schuster, 2002 ).
Posted by Allison Holmes at 8:24 AM 4 comments:
Email ThisBlogThis!Share to XShare to FacebookShare to Pinterest
Labels: Desserts

Thursday, April 16, 2009

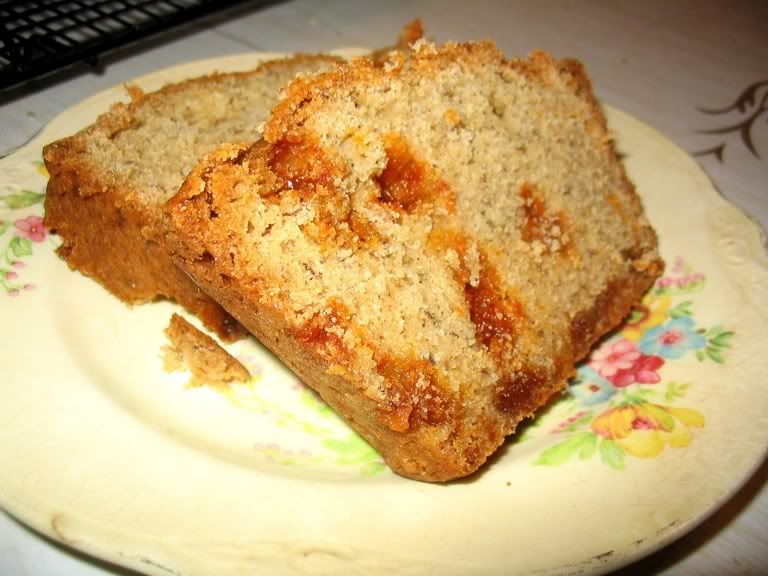
I can't believe it's lowfat butterscotch banana bread


I'm always looking to one-up my recipes that I have on hand. I have about 3 or 4 go to banana bread recipes I use but this one just blows them out of the water. The butterscotch really sweetens up the bread - it's more dessert then bread I guess you could say...but that's what I like. This bread is dense but also light at the same time, which I would say is a perfect balance. I lightened the caloric and fat load which makes me feel just a tad better after I eat the entire loaf myself.


1/4 c. butter (softened not melted)
1/4 c. low fat sour cream
1/2 c. sugar
1/2 c. brown sugar
2 egg whites
1 1/2 tsp. vanilla
2 tsp lemon juice (didn't have so I squeezed fresh lime)
1 c. browned bananas, mashed (about 2 1/2 lrg ones or so)
1 3/4 c. flour
1 tsp baking soda
1 tsp baking powder
1/2 tsp salt
3/4 c. butterscotch chips

Preheat oven to 350 Grease 1 or 2 bread pans (I made 2 half loaves)
Combine the softened butter, sour cream and sugars. (Do not use mixer it will take away from natural denseness of bread) Add the egg whites and stir well after each addition. Add vanilla and lemon juice. Add mashed bananas, stir well until combined. Add all the dry ingredients to the mixture and stir until just blended (do not over stir, it's the dang gluten I tell ya!) Lastly add the chips and fold in gently. Pour the mixture into pan(s). Bake for 35-40 minutes ...check inside w/ toothpick or dry spaghetti noodle. If not clean stick in for 5 more minutes.
Now praise the brown banana gods and try to share with others.


Banana Bread on Foodista
Posted by Allison Holmes at 12:43 PM 2 comments:
Email ThisBlogThis!Share to XShare to FacebookShare to Pinterest
Labels: Breads, Desserts

Tuesday, April 14, 2009

Pasta with Roasted Red Pepper Sauce


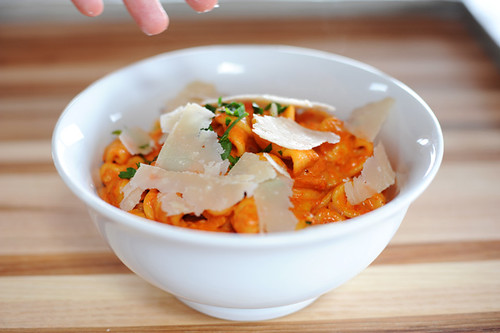
The Pioneer Woman constantly astounds me with all her excellent recipes. I honestly don't think she's capable of make something mediocre, and it's all simple. As in simply incredible! This is a must try ASAP! The Bryce-man loved it and even the squirt gave it thumbs up...as any two year old is capable of doing. But the pictures are brought to you buy PW, by the time I thought to snap a picture this pasta was looong gone!

Pasta with Roasted Red Pepper Sauce

3 red bell peppers
2 tablespoons pine nuts (optional)
1/2 medium onion, finely diced
3 cloves garlic, minced
1/2 cup heavy cream
Flat leaf parsley, finely minced
Fresh Parmesan, shaved or grated
1/2 to 1 pound pasta: orecchiette, penne, fusilli, etc.

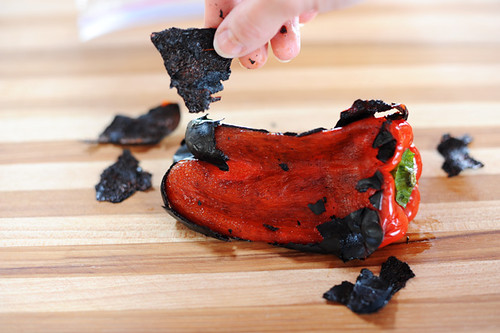
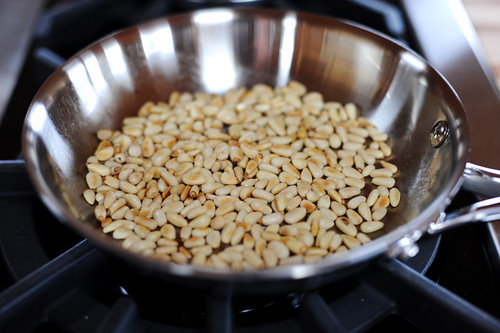
Roast red peppers, (I placed them in a pre-heated broiler and flipped them every couple minutes to get all the sides nice and black) then place in a Ziploc bag to allow to sweat. (While peppers are "sweating" you can toast the nuts as shown below) Peel the charred skins from the peppers, then removed seeds. Set aside.

Lightly toast pine nuts in a skillet. Set aside.

Puree peppers with pine nuts. Set aside.

Cook pasta according to package directions.

In a skillet or pot over medium heat, drizzle in olive oil. Add diced onions and garlic and cook until soft. Pour in pepper puree and stir together. Add plenty of salt.

Pour in cream and stir to combine. Taste and add more salt, if necessary. Add cooked pasta, then stir together.

Place pasta into a bowl, top with chopped parsley and plenty of shaved Parmesan.

Give thanks for Italy.

Posted by Allison Holmes at 9:54 PM No comments:
Email ThisBlogThis!Share to XShare to FacebookShare to Pinterest
Labels: Dinner, Pasta

Monday, April 6, 2009

Black Bean, Chicken and Red Pepper Stew


I have never been a real soup/stew maker, but maybe (just maybe) I'll have to become one. It's supposed to be so easy right? Stick all your ingredients into a crock pot/ stock pot and boom bang bam your done. I just couldn't pass up putting this recipe in my bloggy cook book. Every ingredient in it sounds amazing, there is just no way to go wrong.

But you just might want to stand to the side while I blow out all the dust from my crock pot. Time to put this sucker to good use.

Thank you Annie's Eats!


Black Bean, Chicken and Red Pepper Stew
Ingredients:
2 tbsp. olive oil, divided
2-3 chicken breasts, cut up into chunks
1 onion, chopped
2 cloves garlic, minced
3 cans black beans, drained and rinsed
1 (28 oz.) can diced tomatoes
1 (12 oz.) jar roasted red peppers, chopped (or fresh roasted peppers)
1 (4 oz.) can diced green chiles
2 cups reduced-sodium chicken broth
2 tbsp. cumin
1/2 tsp. cayenne pepper
Salt and pepper, to taste
1/2 cup fresh cilantro, chopped

Directions:
In a large Dutch oven or stockpot, heat 1 tablespoon olive oil over medium-high heat. Add chicken pieces and cook, stirring, until browned and cooked through. Transfer to a bowl with a slotted spoon and set aside. Heat the remaining tablespoon of oil. Add the onion to the pot and saute until tender, about 5 minutes. Add the garlic and cook 1 minute more. Mix in the black beans, diced tomatoes, red peppers, green chiles, chicken broth, cumin, and cayenne. Return the chicken to the pot. Bring the mixture to a boil, then reduce the heat to a simmer. Allow to simmer uncovered for 45 minutes. When finished, remove from the heat, season with salt and pepper and stir in fresh cilantro.

Posted by Allison Holmes at 9:36 PM No comments:
Email ThisBlogThis!Share to XShare to FacebookShare to Pinterest
Labels: Chicken, Dinner, Soup

Cilantro-lime chicken with avocado salsa

Let's be healthy today for a change... mmmm this came from one of the blogs I stalk...I mean follow! Doesn't it look so fresh and fabulous! If only I had some tomatoes in my fridge I would whip this up right now. I LovE fresh cilantro, it's so unique and reminds me of a summer BBQ.


Cilantro-lime chicken with avocado salsa

Cilantro-lime chicken with avocado salsa

Serves 4 (1 chicken breast, 1/4 cup salsa)

CHICKEN:
2 tablespoons minced fresh cilantro
2 1/2 tablespoons fresh lime juice
1 1/2 tablespoons olive oil

1 1/2 tsp garlic
4 (6-ounce) skinless, boneless chicken breast halves
1/4 teaspoon salt

SALSA:
1 cup chopped plum tomato (about 2)
2 tablespoons finely chopped onion
2 teaspoons fresh lime juice
1/4 teaspoon salt
1/8 teaspoon freshly ground black pepper
1 avocado, peeled and finely chopped

1 tbsp. chopped cilantro

Directions:

1. To prepare chicken, combine cilantro, lime juice, garlic, chicken and olive oil in a large bowl; toss and let stand 3 minutes. Remove chicken from marinade; discard marinade. Sprinkle chicken evenly with 1/4 teaspoon salt. Grill over medium-high heat until done.

2. To prepare salsa, combine tomato, onion, lime juice, salt and pepper in a medium bowl. Add avocado and cilantro; stir gently to combine. Serve salsa over chicken.

Posted by Allison Holmes at 8:30 PM No comments:
Email ThisBlogThis!Share to XShare to FacebookShare to Pinterest
Labels: Chicken, Dinner, Mexican

Sunday, April 5, 2009

Homeade Buttermilk Bread

Here is the bread recipe I used when i went on this weird "I want to be self-sufficient" trip. It is so unlike me to want to make bread, how domestic is that anywho!? But I did but I am glad because it was soooo super good. It reminded me of when my mom used to make it for us when we were growing up. The smell is absolutely incredible as it's baking.

Now I made these 2 loafs with no mixer and no bread maker...talk about skill! Haha no really that's how unprepared I was...I was lucky I had packets of yeast in my cupboard (what the crap were they doing there anyways!?) Also, I didn't proof the yeast but not having a bread maker I probably should of (didn't rise as much as it should have) and I only ended up using 4 cups of flour - all purpose...I know that's a no-no in bread making (bread flour has more protein in it to aid in rising) ...again probably why my dwarf loaves didn't rise completely...

Meh

That just goes to show anyone can really cook and not have a clue about what they should be doing.

Well this domestic episode has me coveting for a bread maker. I want it right this moment! So I guess we'll see. I should have it by the end of this week :)


Buttermilk Bread
  • 1 1/2 cups buttermilk
  • 1/2 cup warm water (110 degrees F/45 degrees C)
  • 1/2 cup margarine
  • 1/4 cup white sugar
  • 1/2 teaspoon baking soda
  • 2 (.25 ounce) packages active dry yeast
  • 2 teaspoons salt
  • 5 1/2 cups bread flour

DIRECTIONS

  1. Proof yeast in warm water.
  2. Place the butter or margarine and buttermilk in a small saucepan. Heat slowly until butter or margarine has melted. Cool to lukewarm.
  3. Place sugar, salt, baking soda, buttermilk mixture, and yeast in large mixing bowl. Add 3 cups flour one cup at a time, and mix with the dough hook attachment of an electric mixer. Gradually add the remaining flour while continuing to mix. When dough is not sticky, turn out on a lightly floured surface. Knead for several minutes, until the dough is soft and smooth. Place in a greased bowl, and turn once. Allow to rise until doubled in size.
  4. Punch down the dough. Divide, and shape into 2 loaves. Place in two well greased 8 x 4 inch bread pans. Allow to rise until dough has risen one inch above pans.
  5. Bake in a preheated 375 degrees F (190 degrees C) oven for 30 to 35 minutes. Loaves are done when nicely brown and hollow sounding when thumped.
Posted by Allison Holmes at 1:12 PM No comments:
Email ThisBlogThis!Share to XShare to FacebookShare to Pinterest
Labels: Breads

Truck Stop Buttermilk Pancakes

This week it seems like we have been eating buttermilk up the nose! I had a quart in the fridge that was nearing death and refrigerator resurrection (aka old and moldy!)
So to save it's buttery life and to fill our tummies we have had buttermilk pancakes, buttermilk bread (recipe to follow), homeade buttermilk ranch dressing, buttermilk in my brownies...wowee I swear if there was any left I probably would have put the rest in my bathtub!! (good for the skin? maybe!)

So these pancakes are STELLAR! I (like most of you) always made pancakes from the bag (Krusteaz, Betty Crocker, Bisquick, etc.) But after eating these I don't think I can go back! Seriously they are drool worthy!


  • 2 eggs
  • 1/2 cup and 2 tablespoons milk
  • 2 tablespoons and 1-1/2 teaspoons butter, melted
  • 2 cups and 1 tablespoon buttermilk
  • 2 cups and 1 tablespoon all-purpose flour
  • 2 teaspoons baking powder
  • 2 teaspoons baking soda
  • 3/8 pinch salt (optional)
  • 2 tablespoons and 1/4 teaspoon sugar

  1. In a large bowl, whisk together the eggs, milk, butter and buttermilk. Combine the flour, baking powder, baking soda and sugar; stir into the wet ingredients just until blended. Adjust the thickness of the batter to your liking by adding more flour or buttermilk if necessary.
  2. Heat a large skillet over medium heat, and coat with cooking spray. Pour 1/4 cupfuls of batter onto the skillet, and cook until bubbles appear on the surface. Flip with a spatula, and cook until browned on the other side. Continue with remaining batter.
Posted by Allison Holmes at 1:05 PM No comments:
Email ThisBlogThis!Share to XShare to FacebookShare to Pinterest
Labels: Breakfast

Chicken, Lemon and pea Risotto


I was first introduced to cooking with Risotto from my good friend from Italy. I buy it at Costco, but for smaller packages I'm sure you can get at Trader Joes or maybe even local supermarkets. Risotto is known to be a tad more temperamental than regular rice, so your first time I would recommend you not to Facebook or watch Dexter or Good Eats...as I often do while cooking:) Enjoy!
I haven't tried this one out yet...but seriously how could it not be good??? I'll return and report soon!

Chicken, Lemon and Pea Risotto

Inspired by Donna Hay

Serves 4
2 Tbsp. Olive oil
1 small onion, peeled and thinly diced
1 stick of celery, thinly diced (optional)
1 garlic clove, peeled and thinly chopped
zest of half a whole lemon
1 cup Aborio rice or really any type of risotto you can find
Good splash of dry white wine
Approximately 3 c. Chicken stock
Good couple handfuls of frozen peas
1 cup shredded cooked chicken, white, brown meat or a mixture
Juice of half a whole lemon
Salt and pepper
handful of parmesan cheese

  1. Heat the stock in a small saucepan.
  2. Heat olive oil in a large frying pan over a medium heat. Once hot add the onion and celery and sweat (with the lid on), stirring occasionally until soft but not brown (5-10 mins).
  3. Add the garlic and lemon zest and cook for a few minutes, again stirring frequently.
  4. Add the rice and turn up the heat. Stir to coat the rice (from here on you need to stir much more frequently to stop the rice sticking or burning and also to release the starch to make it deliciously creamy).
  5. You should notice the rice become translucent and at this point you need to add the wine and continue to stir.
  6. Once the wine has been absorbed by the rice, add the first ladel of stock and turn the heat back down to medium. Keep stiring.
  7. Once this ladel of stock has been fully absorbed by the rice, add another ladel, stir and repeat until the rice is cooked (try it - is it soft with a little bit of bite left? Yes - then move on to the next step, No - add more stock).
  8. Add the frozen pea before the last couple of ladels so they have time to cook.
  9. Once the rice and peas are cooked, remove from the heat, add the lemon juice and chicken. Stir to mix well, season to taste.
  10. Scatter the parmeson (and a few small knobs of butter if you like) over the top, replace the lid and leave to become oozy/creamy ( few minutes).
  11. Once the cheese and butter(if using) have melted, stir well and serve.
Enjoy!
Posted by Allison Holmes at 12:01 PM No comments:
Email ThisBlogThis!Share to XShare to FacebookShare to Pinterest
Labels: Appetizer, Chicken, Dinner, Rice, Side Dish

Baked Mac and Cheese


I really do love homeade Mac n Cheese. So here is good ole Martha's take on it. Yum!

Martha Stewart's Macaroni & Cheese
Serves 12

Ingredients
8 tablespoons (1 stick) unsalted butter, plus more for dish
6 slices good white bread, crusts removed, torn into 1/4- to 1/2-inch pieces
5 1/2 cups milk
1/2 cup all-purpose flour
2 teaspoons salt
1/4 teaspoon freshly grated nutmeg
1/4 teaspoon freshly ground black pepper
1/4 teaspoon cayenne pepper, or to taste
4 1/2 cups grated sharp white cheddar cheese (about 18 ounces)
2 cups grated Gruyere cheese (about 8 ounces) or 1 1/4 cups grated Pecorino Romano cheese (about 5 ounces)
1 pound elbow macaroni

Directions
Heat oven to 375 degrees. Butter a 3-quart casserole dish; set aside. Place bread in a medium bowl. In a small saucepan over medium heat, melt 2 tablespoons butter. Pour butter into bowl with bread, and toss. Set breadcrumbs aside.

In a medium saucepan set over medium heat, heat milk. Melt remaining 6 tablespoons butter in a high-sided skillet over medium heat. When butter bubbles, add flour. Cook, whisking, 1 minute.

While whisking, slowly pour in hot milk. Continue cooking, whisking constantly, until the mixture bubbles and becomes thick.

Remove pan from heat. Stir in salt, nutmeg, black pepper, cayenne pepper, 3 cups cheddar cheese, and 1 1/2 cups Gruyere or 1 cup Pecorino Romano; set cheese sauce aside.

Fill a large saucepan with water; bring to a boil. Add macaroni; cook 2 to 3 minutes less than manufacturer's directions, until the outside of pasta is cooked and the inside is underdone. (Different brands of macaroni cook at different rates; be sure to read the instructions.) Transfer macaroni to a colander, rinse under cold running water, and drain well. Stir macaroni into the reserved cheese sauce.

Pour mixture into prepared dish. Sprinkle remaining 1 1/2 cups cheddar cheese, 1/2 cup Gruyere or 1/4 cup Pecorino Romano, and breadcrumbs over top. Bake until browned on top, about 30 minutes. Transfer dish to a wire rack to cool 5 minutes; serve hot.


Posted by Allison Holmes at 11:14 AM No comments:
Email ThisBlogThis!Share to XShare to FacebookShare to Pinterest
Labels: Dinner, Pasta

Monday, March 30, 2009

Feta and Vegetable Rotini Salad


This is my favorite summer pasta salad...I made this for a changing shift party for my hubbers and it was gone before we even got up to the table. I sometimes also add chopped pepperoni to mine for an extra pop. Enjoy {Kim} lol :)


3 cups tri-color rotini pasta, cooked, drained and cooled
1 cup Athenos Traditional crumbled feta cheese
1 cup halved cherry tomatoes
1 cup chopped unpeeled cucumber
1/2 c. sliced black olives
1/2 cup Kraft Zesty italian dressing
1/4 cup finely chopped red onion


Toss all ingredients in a large bowl. Cover and refrigerate for at least one hour to blend the flavors. This makes about 8 1 cup servings.


Posted by Allison Holmes at 10:29 AM No comments:
Email ThisBlogThis!Share to XShare to FacebookShare to Pinterest
Labels: Appetizer, Pasta, Salads, Side Dish

Thursday, March 26, 2009

Super Fast and Easy Steak Stroganoff


Steak Stroganoff

Cook your choice of swirly cut short pasta (tastes better than long noodles) in a large pot according to manuf. directions. I used Picollini (mini bowties), because I love it and it's super cute too. While pasta is cooking,


1 lb steak flap meat (sliced thin), defrosted
2 Tbsp olive oil
1 Tbsp soy sauce
Couple dashes of Montreal steak seasoning
1 tsp minced garlic (I use the pre packed in olive oil minced stuff)

Cook meat in oil, soy sauce, seasoning, and garlic in a shallow saucepan for about 5 minutes per side
Once meat is cooked, remove from pan and cut in to 1 inch pieces. Set aside.

1/4 c. butter
1/2 med. onion
1 1/2 tsp minced garlic

Saute butter, onion and garlic for about 5-7 minutes unitl softened. Add

1 1/4 c. finely chopped mushroom ( I give mine a whirl in the food processor )

and cook another 5 minutes. Add

3 Tbsp. cream cheese (reduced fat)
1/3 c. heavy cream or half and half
1/3 c. milk (we use fat free...hellllo Im trying to stay healthy here)
1/2 c. sour cream (lite)

Stir ingrediants until completely combined. Let cook on med/high for 7-10 minutes stirring occasionally. Drain the pasta when al dente. Combine the pasta and meat with the sauce. You can sprinkle parm. cheese on top if you wish. I didn't wish, but you might :) Serve HOT!
Posted by Allison Holmes at 4:30 PM No comments:
Email ThisBlogThis!Share to XShare to FacebookShare to Pinterest
Labels: Dinner, Pasta

Wednesday, March 18, 2009

Spinach and Artichoke Pasta Bake

Think 'spinach and artichoke dip in pasta form'...where do I sign up?? The original posting of this recipe calls for tortellini, but I figure what the hay...If Ive got them that's fantastic...If not I'm sure ravioli or even any type of shaped pasta would be marvelous in this dish.

To make it a little lighter you can use fat free milk, reduced fat cheeses, and choose a non cheese filled pasta.

Spinach Artichoke Pasta Bake


Serves 6

2 pounds fresh or frozen ricotta-filled tortellini, ravioli, or any shaped pasta
salt
2 tablespoons butter
2 cloves garlic, finely chopped
2 cups milk
a few grates fresh nutmeg (or for us lazy's 1 shake of McCormicks)
1 10-ounce box frozen chopped spinach, defrosted and excess water squeezed out
1 13.75 oz can artichoke hearts, or 1 10-ounce box frozen quartered artichoke hearts, defrosted
ground black pepper
1/2 cup shredded Asiago cheese (I usually don't have this on hand...I'm sure it doesn't make a big difference if you skip it)
1/2 cup grated Parmesan - Romano
1/2 cup mozzarella cheese

Preheat broiler.

Place a large pot of water over high heat to boil. Once boiling, salt the water and drop the pasta in. Cook to al dente according to package directions. Drain cooked pasta and reserve.
While the pasta is working, place a large skillet over medium-high heat with the butter. Cook the garlic in the butter until aromatic, about 1 minute, then sprinkle the flour over the butter and cook for another minute. Whisk the milk into the roux and bring up to a bubble to thicken. Add nutmeg, spinach, artichoke hearts, salt and pepper, and cook until the veggies are heated through.

Add the reserved pasta to the skillet and toss to coat. Transfer everything to a large casserole dish and sprinkle with the cheeses. Place under the broiler to brown, about a minute.

Posted by Allison Holmes at 9:58 PM No comments:
Email ThisBlogThis!Share to XShare to FacebookShare to Pinterest
Labels: Dinner, Pasta

Tuesday, March 17, 2009

Bread and Pasta a la Pioneer Woman

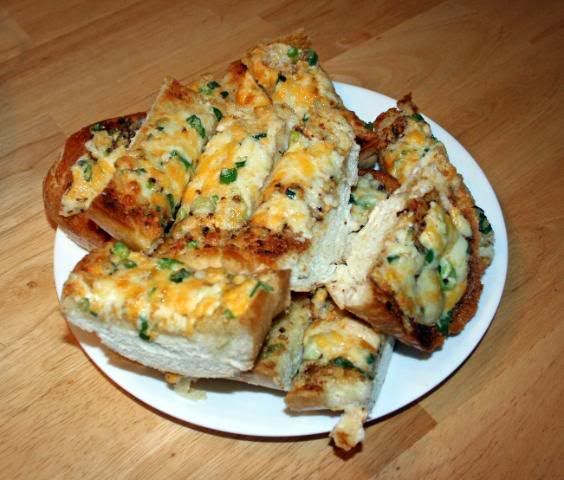
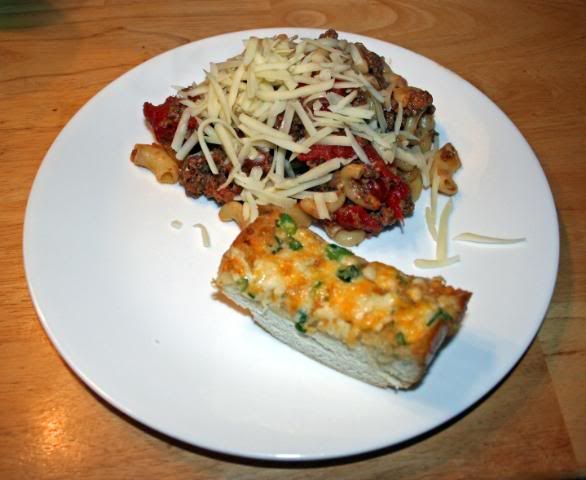
Pioneer Woman Garlic Cheese Bread


1 loaf crust French bread
1 stick butter
3/4 cup cheddar cheese, grated
3/4 cup Monterey Jack cheese, grated
1/2 grated Parmesan cheese
1/2 cup real mayonnaise
4 green onions, white and light green parts minced
Dash of salt
4 cloves garlic, finely minced.

Mix cheeses with the mayonnaise and the green onions. Add dash of salt to taste and set aside or keep in fridge until you need it.Cut loaf of bread in half, then each half into half again.Working 1/4 loaf at a time, melt 2 tablespoons butter in a skillet and add 1/4 of the minced garlic.Place 1 of the 1/4 loaves face down in the skillet, swirling it to soak up the butter and garlic. Allow bread to toast in the skillet, removing garlic if it starts to get too brown.Repeat with remaining butter, garlic, and bread.Spread cheese mixture on warm loaves and bake in a 425 degree oven until cheese is hot and bubbly, about 10 minutes.Slice and serve.
Pioneer Women Pasta


2 tablespoons olive oil
2 pounds ground beef
1/2 large onion, diced
2 cloves garlic, minced
Salt to taste
Freshly ground black pepper to taste
1 generous teaspoon ground thyme
2 14-ounce cans whole tomatoes
1/4 cup freshly grated Parmesan cheese, plus more for sprinkling
1 1/2 to 2 pounds rigatoni


Heat olive oil in large skillet or pot over medium-low heat. Add onion and cook a couple of minutes, until starting to turn translucent. Add garlic and stir, cooking 1 minute, making sure not to brown the garlic.Add ground beef and cook until brown. Drain most of excess fat.Add salt, pepper, and ground thyme. Stir to combine.Dump in canned tomatoes with their juice. Stir, reduce heat to low, and cover pot. Cook for 30 minutes, stirring a couple of times.Uncover the pot and cook an additional 30 minutes.Cook rigatoni according to package directions—don’t overcook! Drain and place individual portions into bowls.Stir in 1/4 to 1/2 cup grated Parmesan into the sauce. Check and adjust seasonings. Ladle sauce over cooked pasta, sprinkle with more Parmesan, and serve.
Posted by Allison Holmes at 12:13 PM No comments:
Email ThisBlogThis!Share to XShare to FacebookShare to Pinterest
Labels: Breads, Dinner, Pasta

Friday, February 13, 2009

Best Ever Chocolate Zucchini Bread


I got this recipe from my grandma - who I think secretly adds a poof of grandma magic to everything she cooks. I swear I don't know what she does but everything that comes out of her kitchen is so super good. This really tastes more like a cake than bread, it makes a fabulous dessert.
You would also never guess that it is a low fat recipe either. The applesause and sour cream really make it moist but not too dense as some breads are known to be.


2 oz unsweetened chocolate
3 eggs
11/2 cups sugar
1/2 oil
1/2 cup applesauce
1/2 cup low fat sour cream
2 cups grated zucchini
1 teaspoon vanilla extract
2 cups flour
1 teaspoon baking soda
1 teaspoon salt
1 teaspoon cinnamon
2 tablespoons cocoa powder
1 cup chocolate chips


Preheat oven to 350 degrees Spray your pans with Pam. 2 loaf pans or a cake pan.
Melt unsweetened chocolate on stovetop or microwave.
In large bowl combine eggs, sugar, oil, zucchini, vanilla and melted chocolate. Add sour cream, applesauce. Beat well. Add flour, baking soda, salt, cinnamon, and cocoa powder. Add chocolate chips and mix until coated. Do not over mix. Pour into pans and bake 60 to 70 minutes for loaf pans, or until toothpick inserted comes out clean.
Posted by Allison Holmes at 2:32 PM 1 comment:
Email ThisBlogThis!Share to XShare to FacebookShare to Pinterest
Labels: Breads, Chocolate, Desserts
Newer Posts Older Posts Home
Subscribe to: Posts (Atom)

Followers

Appetizer (18) Breads (10) Breakfast (8) Cakes (2) Chicken (18) Chocolate (13) Cookies (10) Cupcakes (1) Desserts (35) Dinner (40) Drinks (3) Entertaining (2) Fish (1) Fruit Dip (1) Holiday Ideas (2) Ice cream (2) Menu Planning (2) Mexican (7) Muffins (3) Pasta (11) Pizza (3) Pork (4) Rice (4) Salads (7) Sauces (2) Side Dish (13) Slow Cooker (6) Soup (4) Special Occasions (3) Tamales (1)
  • ►  2011 (12)
    • ►  October (2)
    • ►  September (3)
    • ►  August (1)
    • ►  March (2)
    • ►  January (4)
  • ►  2010 (41)
    • ►  December (2)
    • ►  November (5)
    • ►  October (2)
    • ►  September (9)
    • ►  August (2)
    • ►  July (5)
    • ►  June (6)
    • ►  May (4)
    • ►  March (1)
    • ►  February (3)
    • ►  January (2)
  • ▼  2009 (64)
    • ▼  December (1)
      • Oreo Truffles
    • ►  November (2)
      • Grandma Hastain's Apple Crisp
      • Ultimate Pumpkin Swirl Cheesecake
    • ►  October (4)
      • Sesame Noodles
      • Pumpkin Spice Muffins with Cream Cheese Frosting
      • Pumpkin Pie Bites
      • Frosted Banana Bars
    • ►  September (2)
      • BBQ Chicken Pizza
      • My Favorite Steak Topper
    • ►  August (3)
      • My Favorite Steak Marinade
      • Lemon Sugar Crusted Blueberry Muffins
      • Knock yer socks off Zucchini Cakes
    • ►  July (5)
      • Dark Chocolate Molten Lava Cake
      • Easy Peasy Poppyseed Chicken Casserole
      • Summer Potato Salad
      • Strawberry Cream Pie
      • Watermelon Lemonade
    • ►  June (1)
      • I'm Back!
    • ►  May (10)
      • Off to Maui!
      • Reese's Pieces PB Cookies
      • Chicken and Spinach Calzones
      • Whopper Bars
      • Happy Mother's Day!
      • Smashed Potatoes
      • Garlic Rice
      • My Fav CCC Recipe
      • Cream Cheese Chicken
      • Must Try Cheesecake
    • ►  April (12)
      • The Best Apple Dip. Period.
      • Frozen Limeade Punch
      • Water Punch
      • Angel Food Cake with Strawberries and Whipped Cream
      • I can't believe it's lowfat butterscotch banana bread
      • Pasta with Roasted Red Pepper Sauce
      • Black Bean, Chicken and Red Pepper Stew
      • Cilantro-lime chicken with avocado salsa
      • Homeade Buttermilk Bread
      • Truck Stop Buttermilk Pancakes
      • Chicken, Lemon and pea Risotto
      • Baked Mac and Cheese
    • ►  March (4)
      • Feta and Vegetable Rotini Salad
      • Super Fast and Easy Steak Stroganoff
      • Spinach and Artichoke Pasta Bake
      • Bread and Pasta a la Pioneer Woman
    • ►  February (2)
      • Best Ever Chocolate Zucchini Bread
    • ►  January (18)
  • ►  2008 (3)
    • ►  December (3)

Good Eats

  • Brown Eyed Baker - A Food & Cooking Blog
    Friday Things #577
  • Picky Palate
    Double Chocolate Chip Banana Bread
  • recipegirl.com
    Spaghetti Salad Recipe
  • Bake or Break
    Mini No-Bake Cheesecakes
  • Mommy's Kitchen
    White Peach Jam & Peach Scrap Jelly
  • smitten kitchen
    slushy paper plane
  • David Lebovitz
    paris book event – june 29, 2025
  • bakerella.com
    Summertime Sweets
  • Baking Bites
    Blueberries and Cream Bread Pudding
  • Annie's Eats
    Twin Tie Dye Sweatshirts
  • The Pioneer Woman Cooks | Ree Drummond
    This Saturday’s Recipes by The Pioneer Woman
  • Chef Mommy
    Skinny Turkey Meatballs
  • Gorgeous Gourmet
    We've MOVED!
  • Cake Wrecks
    We Moved!!!
  • Confessions of a Cookbook Queen
  • Cinnamon Spice & Everything Nice

Little ol' Me

Welcome to my online recipe book! The recipes you will find on here are some of my own, or some collected while blog surfing or watching Food Network. I am simply an amateur cook and an avid recipe collector who loves to dabble in the never ending possibilities in the kitchen. Cooking for a hungry husband and a picky three year old is the name of the game here folks. Don't expect anything too wild and crazy, just plain and simple recipes for those of us who have no time and energy for immaculate presentation and extremely long and expensive shopping lists.


Also please feel free to leave me a comment if you made a dish and liked it...or not, or if you have any questions about a recipe. I love feedback and I love trying to perfect the chef in me.


All recipes are on Petitchef

My photo
View my complete profile

LinkWithin

Related Posts Widget for Blogs by LinkWithin

FEEDJIT Live Traffic Feed


I changed my font at thecutestblogontheblock.com

Free Web Site Counter
Free Counter
Simple theme. Powered by Blogger.